Table of Contents
 Guide for old cloud
Introduction
As computational power highly depends on sufficient hardware resources, it is a matter of financial liquidity and adequate premises whether enough computing capacities can be supplied. Hence a central facility is desirable which pools monetary efforts and provide a de facto computational platform for bioinformaticians and life scientists (henceforth called users) in the field of microbiology. In Giessen, the Bioinformatics Core Facility (BCF) provides and maintains hardware and supports users to make efficient use of latter one. While the existing Cluster Computing technology already offers computational power in a more or less accessible way, finite hardware resources and low scalability restrict user capabilities.
As opposed to this, Cloud Computing allows users to allocate computing resources on demand and avoids hardware provisioning far ahead. Additionally, rolled out hardware can grow with the need of the project, e.g. starting small and increase resources if necessary. Finally, users can append or remove storage or processor capacities flexible by the hour and by the day. Thus computational power can be released in a highly dynamically manner, allowing BCF to reallocate them to further high priority projects.
Therefor, BCF introduces a Cloud Computing platform for bioinformaticians, biologists and researchers in general in the field of microbiology. The following article guides new users in detail through necessary first steps. Bioinformaticians with less or no Cloud related experience may use the introduction as a starting point and should use the linked material to dig deeper and be able to use the offered infrastructure in their everyday work.
Concurrent the official website (http://www.openstack.org/), “OpenStack is a cloud operating system that controls large pools of compute, storage, and networking resources throughout a datacenter, all managed through a dashboard […] empowering their users to provision resources through a web interface.” The aforementioned dashboard is the first you will see after logging in.
Furthermore it is open source software for creating private and public clouds. The access is provided via the aforementioned dashboard. Besides the dashboard, OpenStack “consists of a series of interrelated projects delivering various components for a cloud infrastructure solution”. Specifically, the core services comprising (adapted from http://docs.openstack.org/ops-guide/common/glossary.html):
- Compute (Nova) implements services and associated libraries to provide massively- scalable, on-demand, self-service access to compute resources, including physical hardware, virtual machines, and containers
- Networking (Neutron) implements services and associated libraries to provide on-demand, scalable, and technology-agnostic network abstraction, which means in particular the interface between components provided by Nova
- Object storage (Swift) provides eventually consistent and redundant storage and retrieval of fixed digital content, used to store data, including virtual machine images
- Block storage (Cinder) implements services and libraries to provide on-demand, self-service access to Block storage resources, i.g. to add additional persistent storage to a virtual machine (read here for details and a comparison with Swift)
- Identity (Keystone) acts as common authentication system, facilitates API client authentication for OpenStack services
- Image (Glance) provides services and associated libraries to store, browse, share, distribute and manage virtual machine images and corresponding meta data definitions
- Dashboard (Horizon) web-based user interface for all OpenStack services
- Telemetry (Ceilometer) collects measurements of the utilization of the physical and virtual resources comprising deployed clouds, persists this data for subsequent retrieval and analysis, and triggers actions when defined criteria are met
- Orchestration (Heat) orchestrates composite cloud applications using templates in the form of text files
Login
Get a BCF-Cloud Account
First of all, you will need an BCF-Cloud account. Please visit this page and follow the instructions in case you still need access. Do not hesitate, to contact the BCF support (bcf@computational.bio) if you need help (it would very sad if your exciting Cloud journey stops that early).
Join/create a Project
Before you can log in, you have to be a member of an existing project. Please contact the project administrator to get adequate permissions.
Dashboard
Access the Cloud Dashboard
As soon your account is released, go to https://cloud.computational.bio.uni-giessen.de. You should something like this:

Enter 'bcf' in the 'Domain' field, your user credentials in the corresponding areas and finally click 'Connect', you will be redirected to the above-mentioned dashboard.
OpenStack Dashboard
If the login was successful you should see the overview page, similar to the screenshot below.
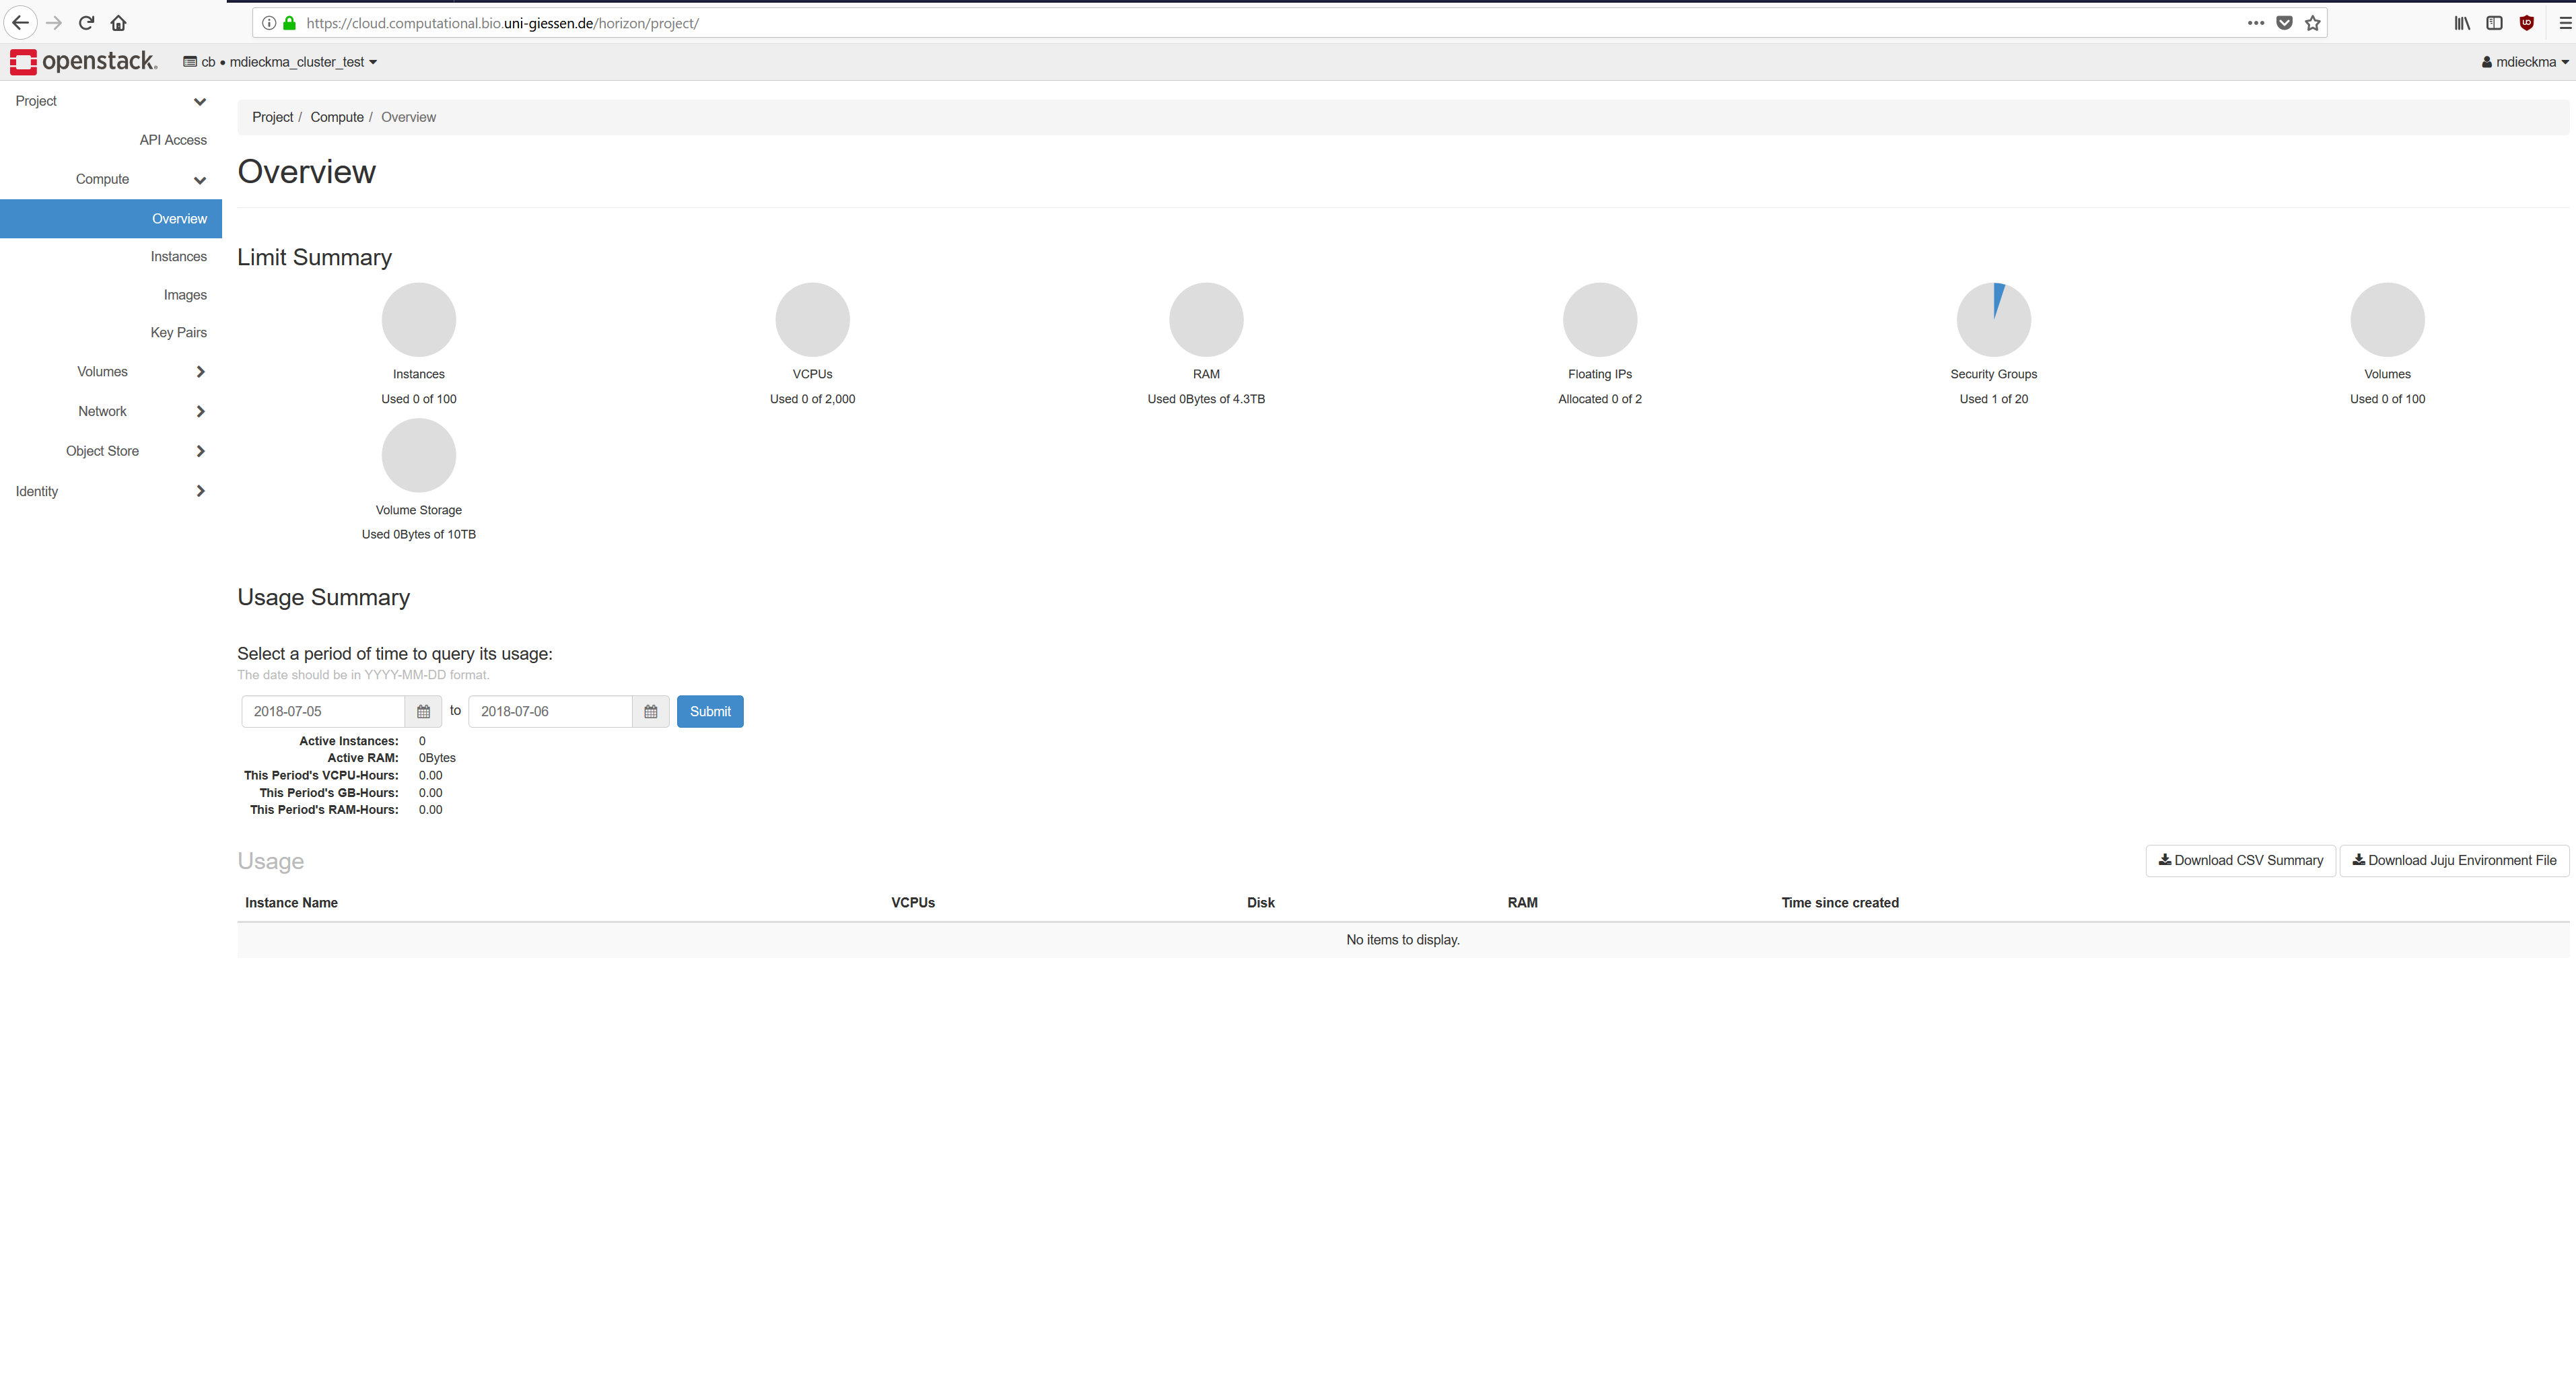
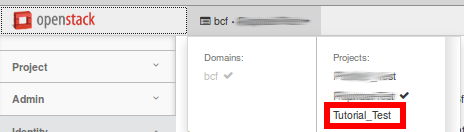
The overview page summarizes the resource allocation (1) within the current project (2). If you are member of several projects you might switch between them here, too. Furthermore at the bottom of the page (3) one can find a list of all virtual machines (instances) belonging to this project.
The terms instance, volumes and images may be confusing in the beginning. To illuminate the things a little bit, one can think of an instance interchangeable with a virtual machine (according to Wikipedia, “an emulation of a computer system […] provid[ing] functionality of physical computer”). Volumes can be think of hard drives, which can be attached to instances and are managed by the Block Storage service. Finally images provide the “recipe” to create a new instances.
The “Instances” (4) section lists all available instances with additional details about the respective virtual machines. Under “Volumes” (5) Horizon provides an overview of all attachable storage devices and finally the “Images” section displays all available image files. Furthermore, users may create (edit, delete) new Instances, Volumes and Images inside the respective section.
Router
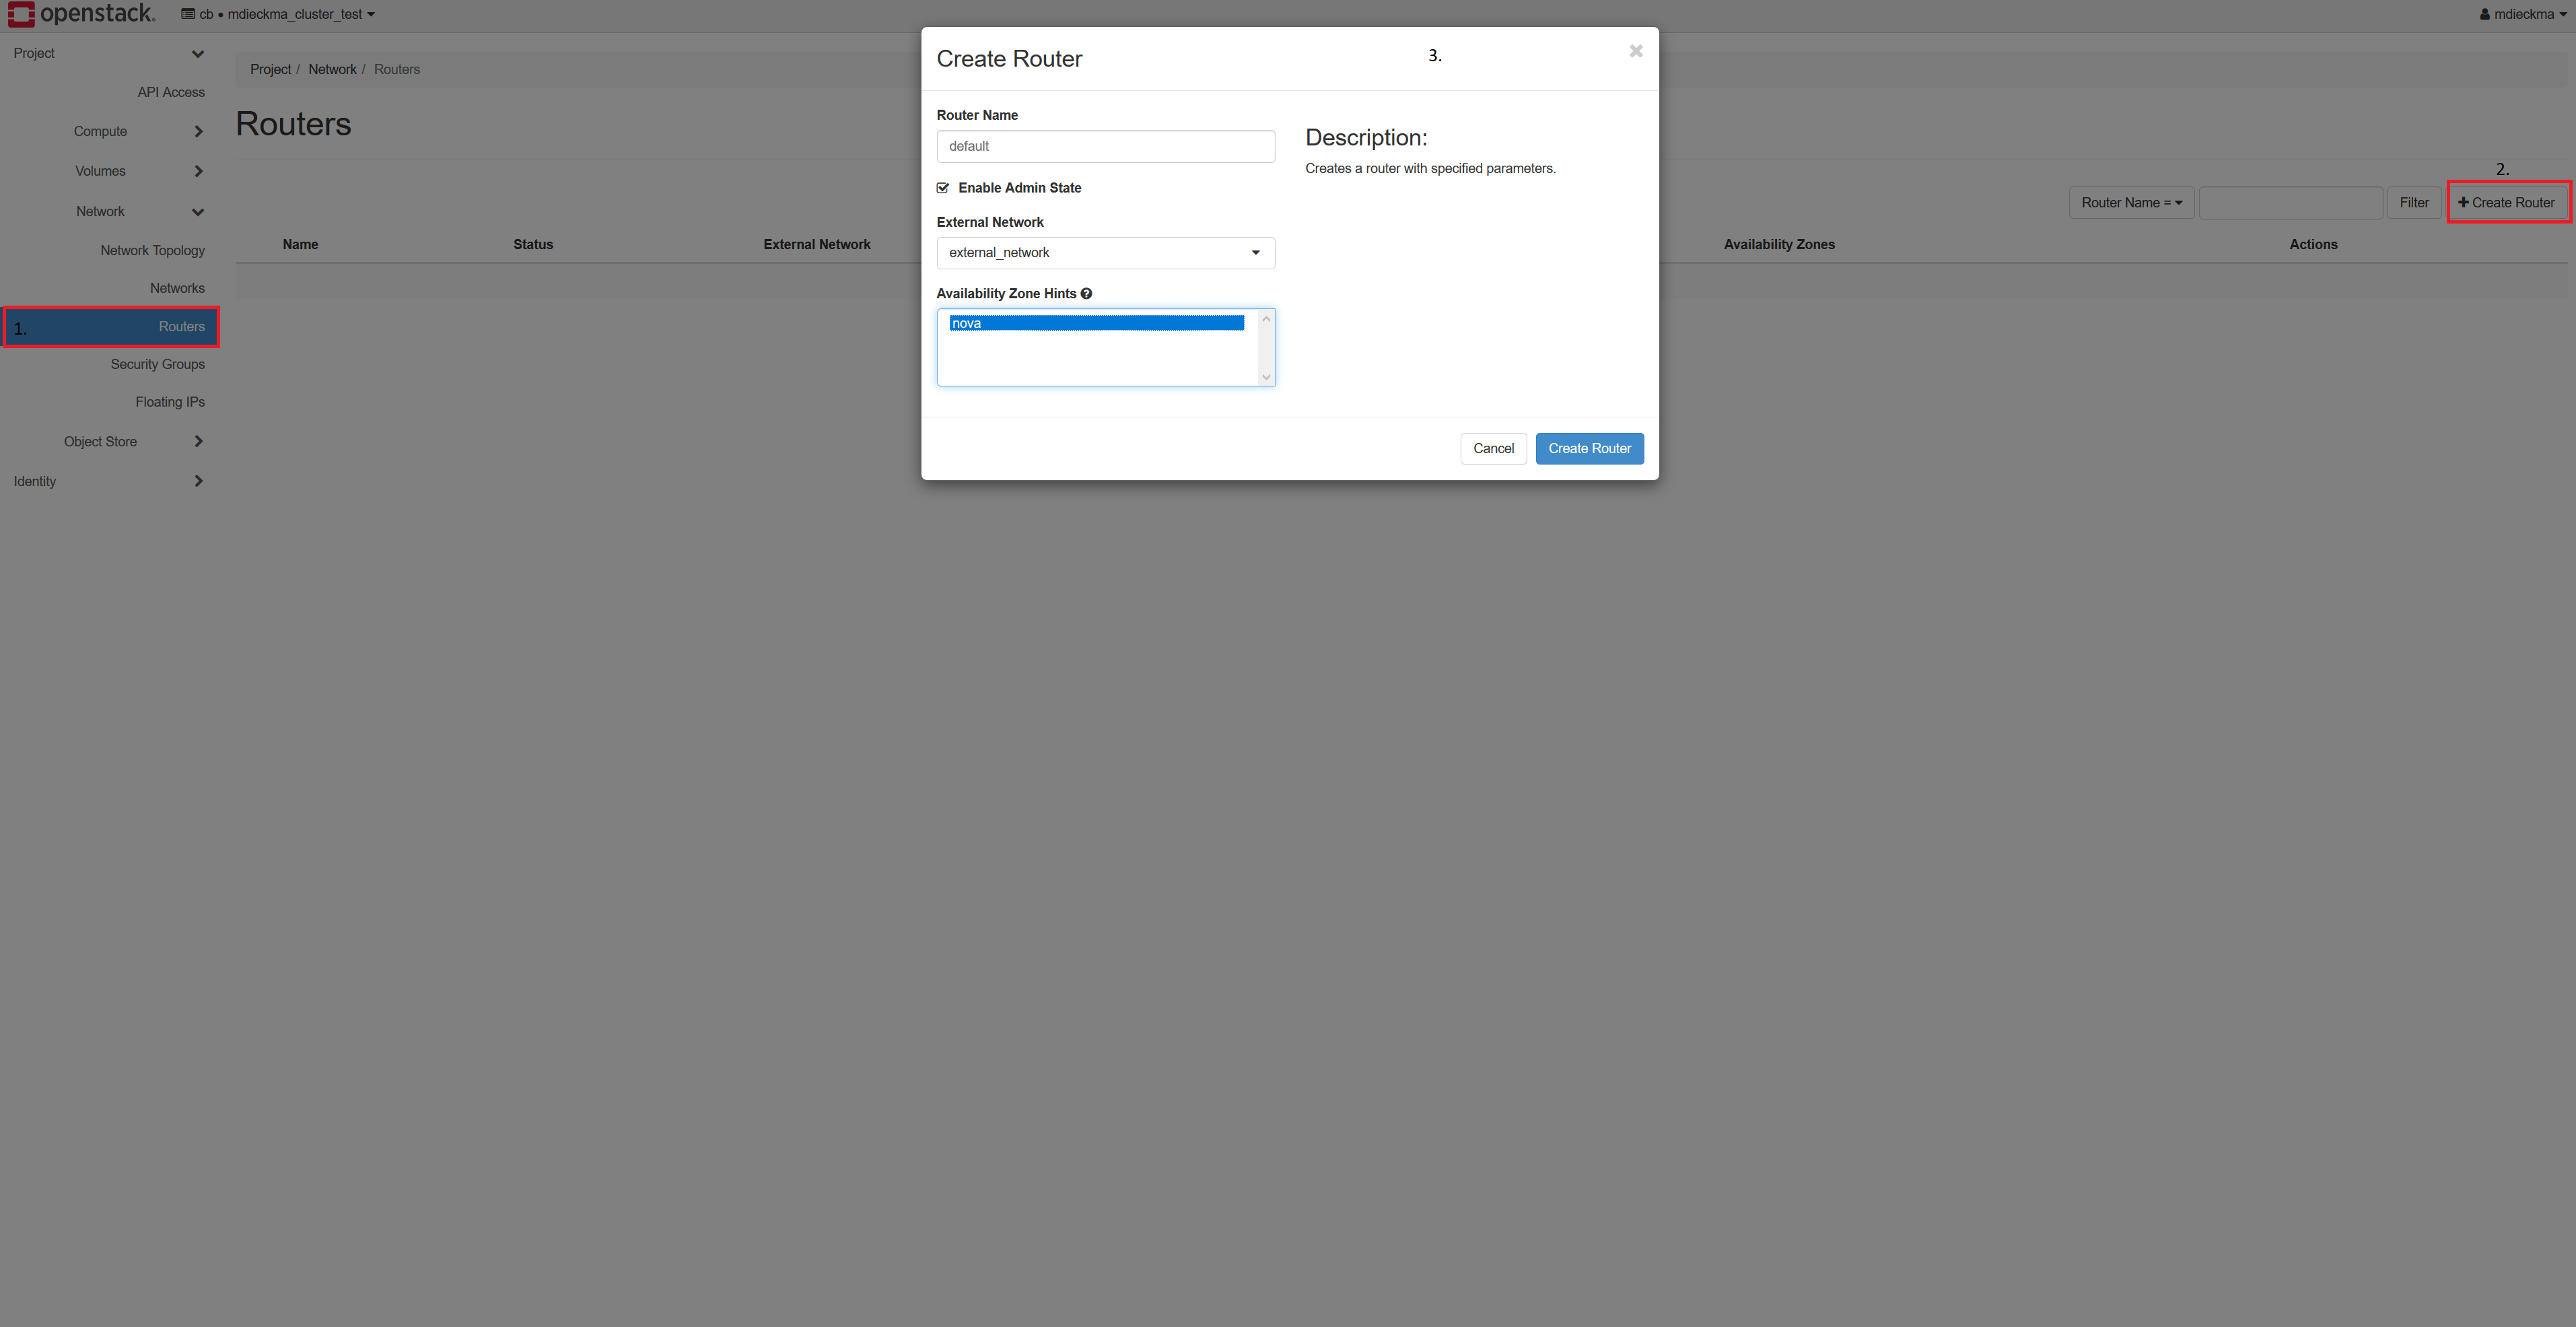
- You need a router!
- Go to Network → Routers and click on Create Router
- Fill in a Name and select for External Network external_network
- Click on Create Router
Network
- Go to Network → Network Topology
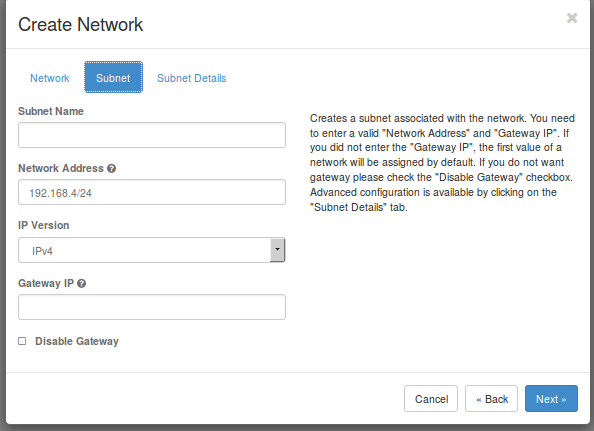
- Click on Create Network and a form will appear
- Fill in a name and click on next
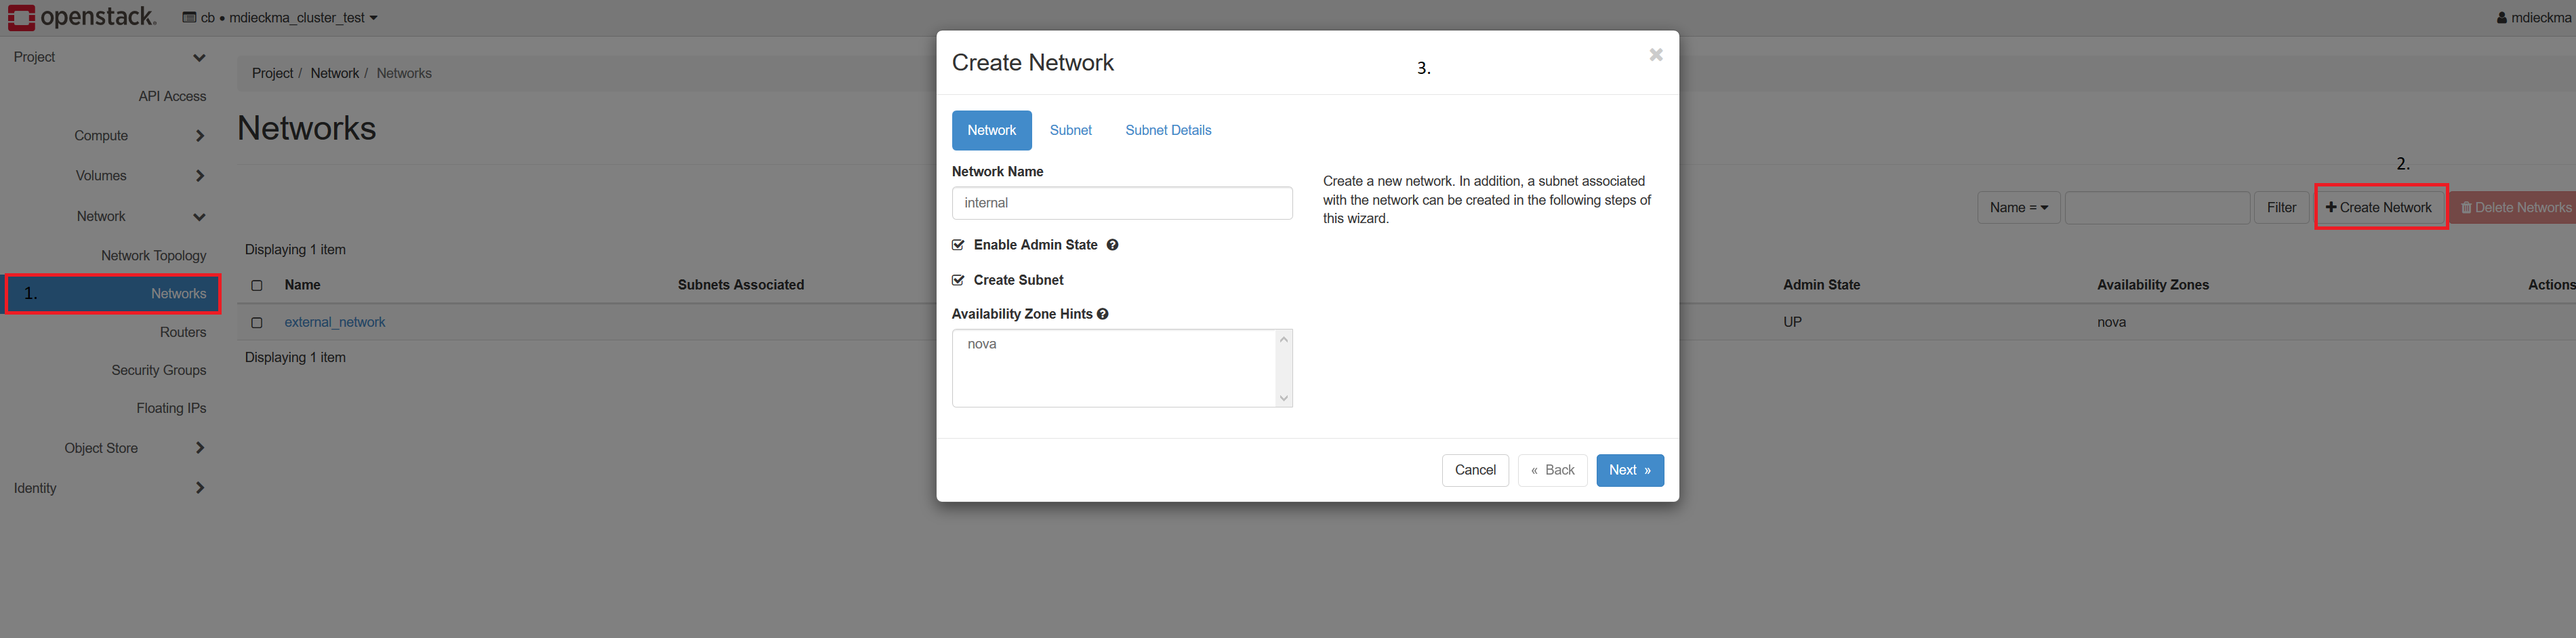
- Fill in a Network Adress (e.g. 192.168.0/24). Let the Gateway IP empty and click on next
- Click on Create
- At your Network Topology Click on your Router
- Click on Add Interface
- Select your new Network (i.e. private) and click on Submit
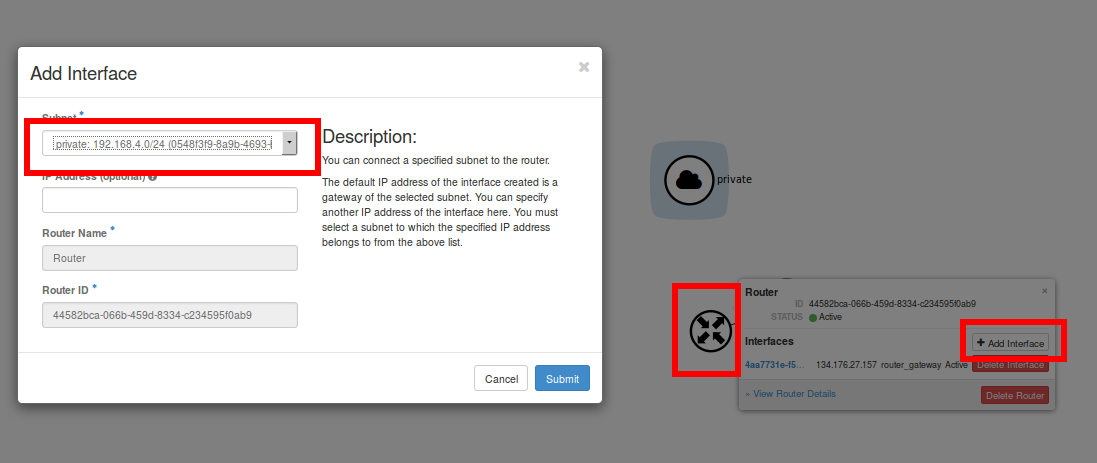
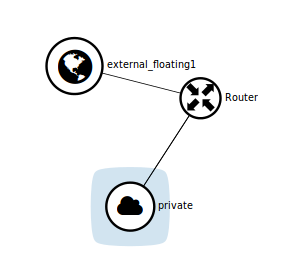
- You should see something like this:
Create Image
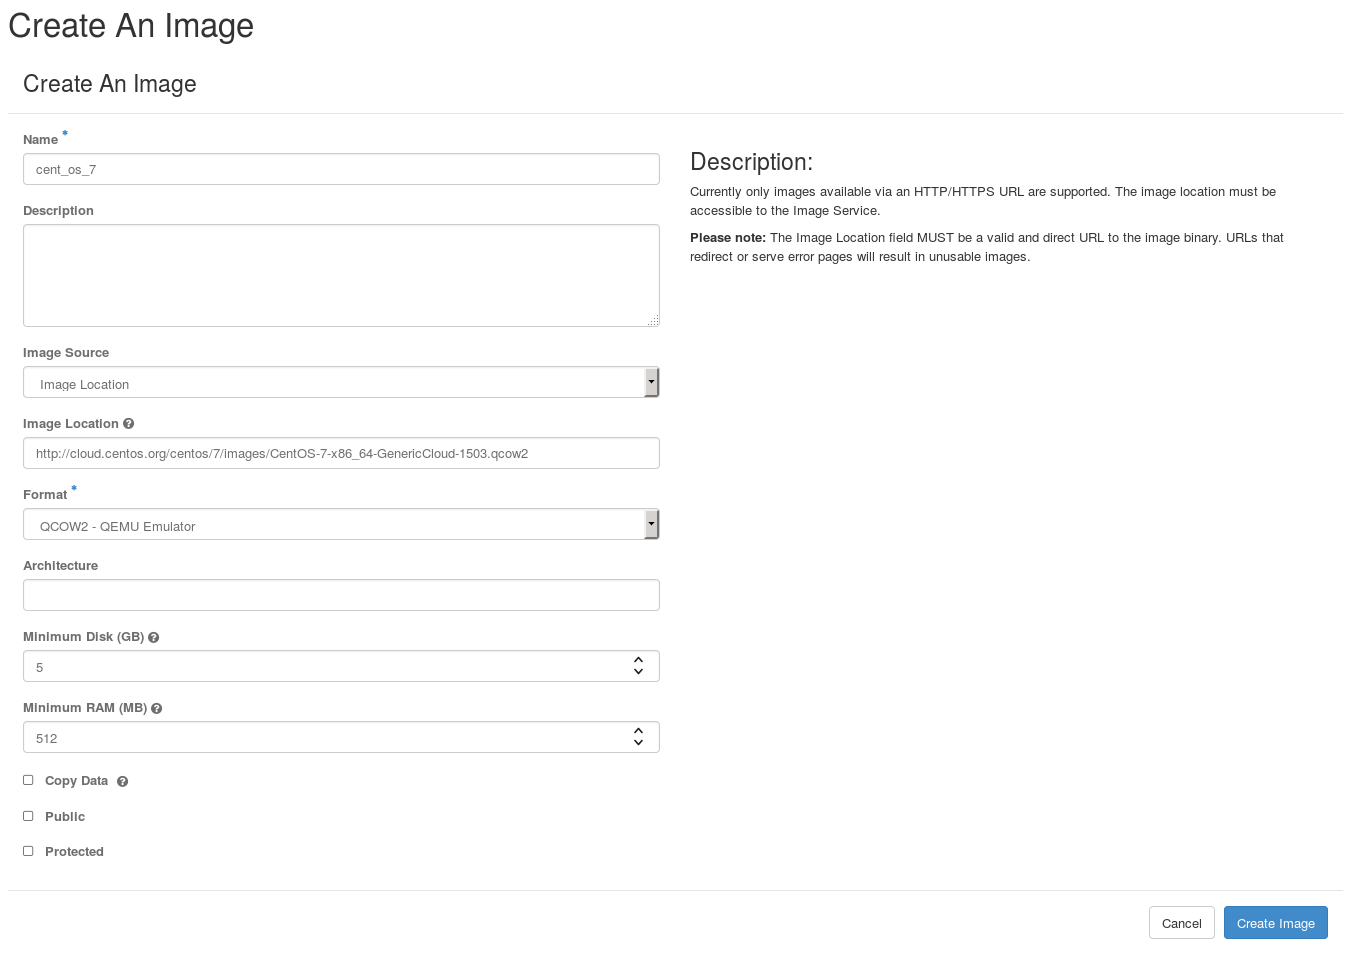
As mentioned above, one can create own images under the “Images” tab. The following screenshot shows the image creation wizard.
You need sufficient permissions (i.e. administrator rights) to create a new image.
You have to specify a name, the source and the location of the image (read here for a comprehensive overview of possible image sources) and the minimum disk space and amount of RAM. At the bottom of the wizard it is possible the assign the desired visibility of your newly created image. After the image creation was successful, you should see your image as a new entry within the “Images” section.
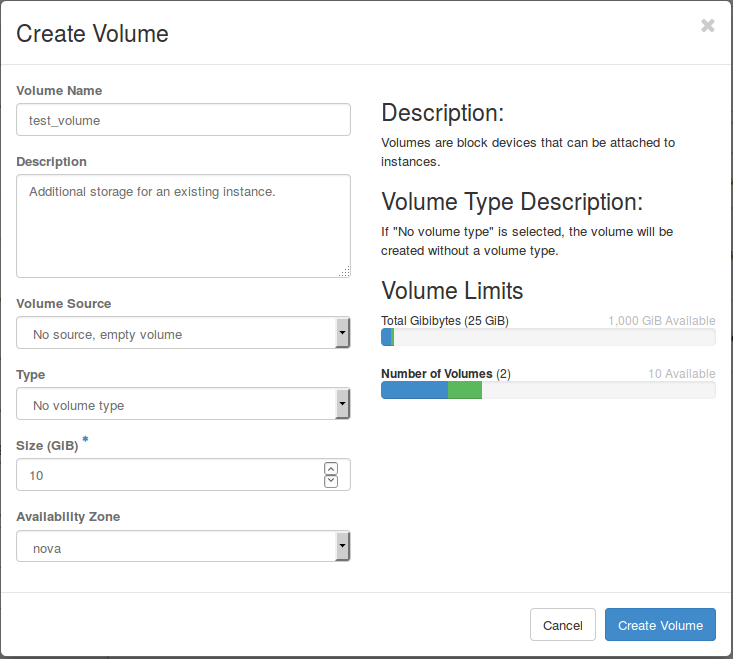
Create Volume
To create a volume, you have to specify a name and the size in GByte. Additionally you could provide a volume source and a type. The former lets you create an empty volume which can be attached to an existing instance. Choosing an image as a source is technically the as same as creating a new image from scratch in the “Images” section.
Create Key Pair
In terms of simplification instructions to create or import a key pair are limited to the external key pair creation tool accessible via the “Access & Security” tab. It is also possible to create or import a key pair during the launch of an instance. The procedure is very similar, but separating these steps improves the clearness and clarity.
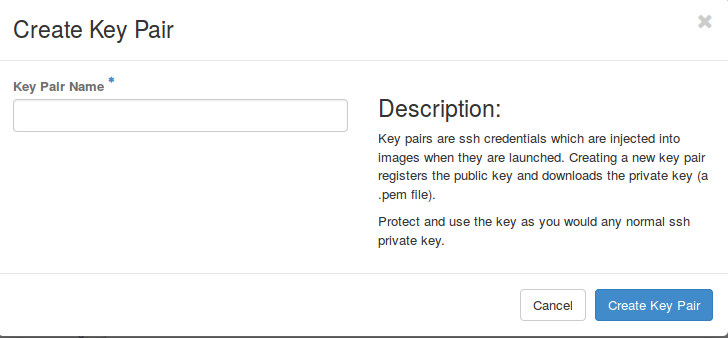
Add Key Pair
Remote connection is enabled via SSH. In order to log into your virtual machine, access to the “Access & Security” tab in the “Compute” section at the left edge of the dashboard. Here, switch to the “Key Pairs” and tab click on “Create Key Pair”. In the opening window (see screenshot below) enter a meaningful name and press “Create Key Pair”. A download dialog box should open which allows you to store a .pem file locally. The .pem is needed to authorize yourself to access your instance.
Configure Key Pair
After you have successfully downloaded your key, it is necessary to adjust the file permissions. Invoking the following the command will modify the file appropriate.
userg@cb-pc08:~$ chmod 600 /path/to/your/public_key.pem
The file permissions should now look like the example above:
-rw------- 1 user cb 1687 Jan 13 13:38 public_key.pem
Import existing Key Pair
Employing an existing SSH key is as simple as creating a new one. Assuming that you already own a key pair (public and private key), there should be a directory, which is usually called .ssh and which is localized in your home directory (~/.ssh). Issuing ls -l ~/.ssh should display something like the output below. Importing an existing key is part of the instance launching, thus we will cover the next steps as part of the latter.
drwx------  2 user cb  4096 Jan 16 14:49 ./
drwx------ 89 user cb 12288 Jan 16 11:29 ../
-rwx------  1 user cb  1703 Dec  9 13:02 authorized_keys*
-rwx------  1 user cb   821 Nov 21  2014 authorized_keys~*
-rwx------  1 user cb  1675 May  2  2014 id_rsa*
-rwx------  1 user cb   410 May  2  2014 id_rsa.pub*
-rw-------  1 user cb  6210 Jan 16 14:50 known_hosts
-rw-------  1 user cb  6210 Jan 16 11:27 known_hosts.old
Launch Instance
Before launching an instance you should have created a “Key Pair” to enable remote connection via SSH to your instance.
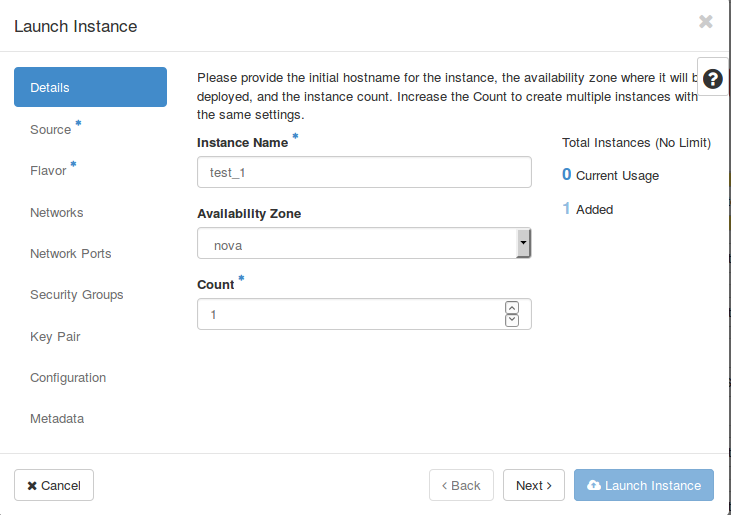
Launching an instance is as easy as the necessary steps aforementioned (creating an image and a volume). First of all, you have to specify a name. If you need to create several copies of your instance, you can can set the desired amount within the “Count” field. Afterwards click on “Next” or the “Source” tab to access the next section.
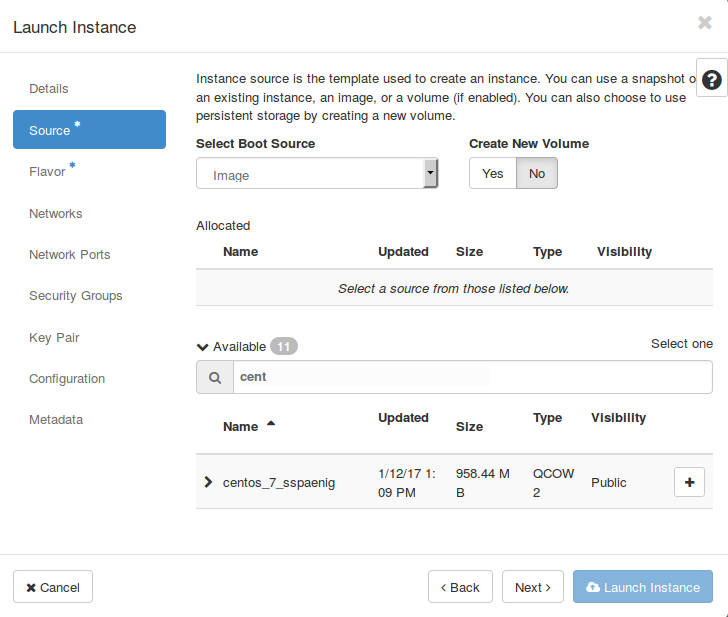
Here, one can load an image source, which will be used as recipe for your new instance. Click on the “+” sign to allocate an image to your virtual machine and click “Next” or choose the “Flavor” tab to switch to the next section. In case there is a volume with an image as source, one can switch the boot source to “Volume” and choose this volume to launch an instance.
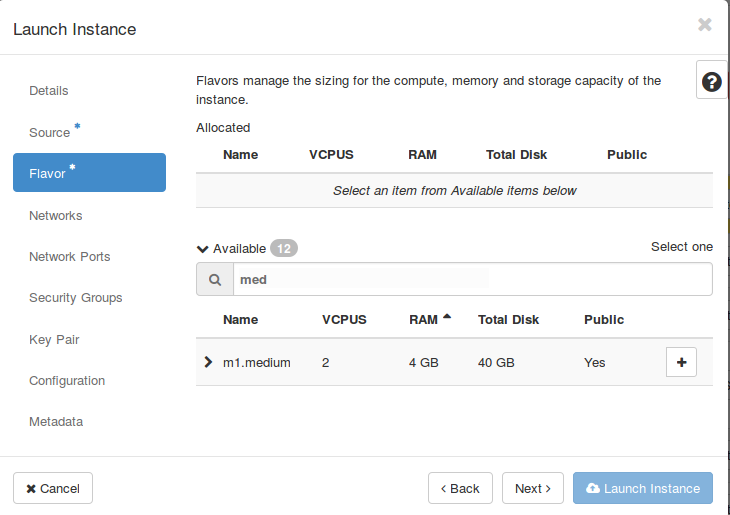
Finally choose an appropriate flavor for your instance. By default OpenStack provides several predefined flavors, pick that flavor which satisfies your needs most.
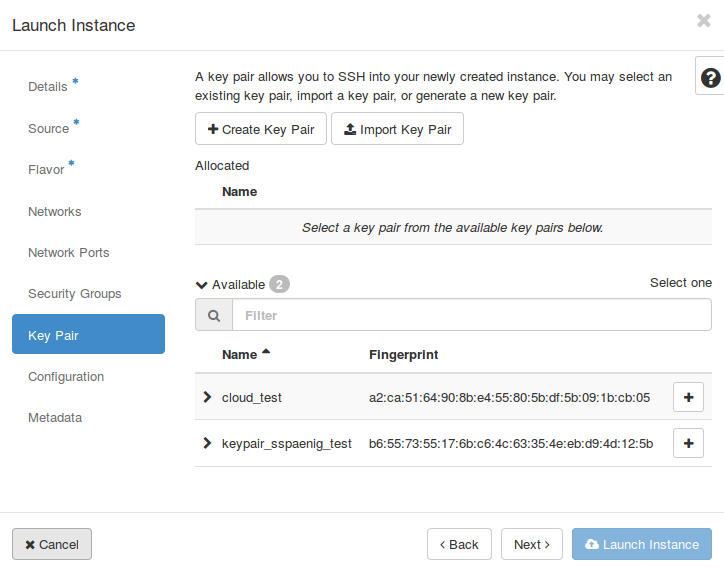
As above-mentioned, one need to provide SSH credentials in order to access a virtual machine. Under “Key Pair” simply click on “+” to allocate your desired key pair.
Associate Floating IP
In order to connect to your virtual machine (= instance), it must be related to a public network address. A private, fixed IP address, used “for communication between instances”, will be assigned automatically to the instance. An IP adress “for communication with networks outside the cloud, including the internet” have to associated manually. Within the “Instances” tab, determine the machine for which a floating IP should allocated, click on (1) and select “Associate Floating IP”.
The amount of floating IPs is restricted by the project quota. Contact the project administrator in case you encounter issues during the association step.

Permit Network Traffic To Floating IP
In order to log into your virtual machine, it's essential to allow network traffic to your floating IP. To achieve this, go to the “Access & Security tab” and click “Create Security Group”, enter a meaningful name (e.g. 'ssh-access') and a description. After the new group was created successfully, manage the rules via clicking on “Manage Rules”.

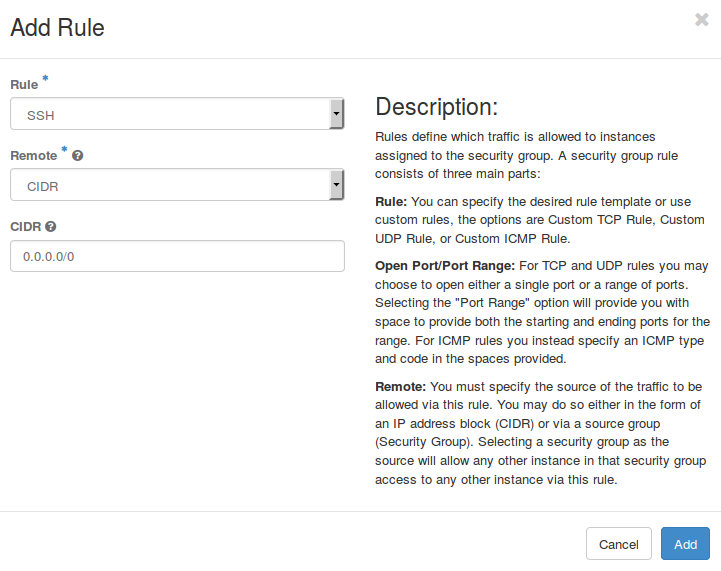
In order to permit network traffic to your instance, click on “Add Rule”, select “SSH” and “CIDR”. Complete the process by clicking on “Add”.
Finally, switch to th “Instances” tab and choose “Edit Security Groups” in the drop-down list of your desired VM. Permit network traffic to your instance by adding the recently created security group.
Connect to Instance
Assuming that all steps above were completed successfully, one can now connect to the instance via SSH. Two different ways
are possible, depending on the manner you have added a key pair. In case a new key pair was created via the OpenStack dashboard, you should have a .pem file. Issuing the following command should connect you to your instance:
user@cb-pc08:~$ ssh -i /path/to/your/public_key.pem centos@134.176.27.175 # <username>@<floating_ip>
Usually pre-existing cloud images already contain user credentials. Have a look here to obtain the user name and password for your image.
If everything works correctly, your terminal should display something similar to the output below:
[centos@user-test-1 ~]$
Accessing the instance via an imported key pair differs only in the type of key (the private key) you will use to connect to your machine:
user@cb-pc08:~$ ssh -i ~/.ssh/id_rsa centos@134.176.27.176
[centos@user-test-2 ~]$
Note that ~/.ssh/id_rsa is the default location for the identity file, thus it can be omitted:
user@cb-pc08:~$ ssh centos@134.176.27.176
[centos@user-test-2 ~]$
Access via SSH Agent
start:
eval `ssh-agent`
ssh-add tutorial_key.pem
ssh -A ubuntu@134.176.27.164
ssh ubuntu@192.168.4.9
kill
eval `ssh-agent -k`
Managing your Project
- In the left corner select your project