This is the quickstart to start your own running virtual maschine in the de.NBI cloud. To start this guide you should have an individual account and be a member of an existing project. If you do not have an account, please visit this page and follow the instructions.
Throughout this guide, we will achive following goals:
First Login
First of all, visit https://cloud.computational.bio.uni-giessen.de/. You should see the following login page:
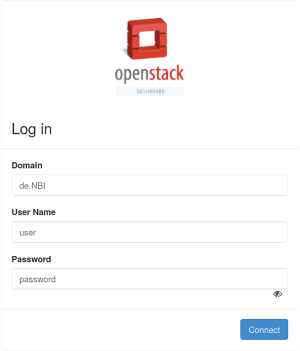
Enter “de.NBI” in the Domain field (without quotes), your user credentials in the corresponding areas and click on the Connect button. You should be redirected to the Openstack Dashboard. If you have any problems or need help logging in, please do not hesitate to contact the de.NBI JLU cloud administration (cloud@computational.bio.uni-giessen.de).
If you are an internal user of the bcf, please visit our access page.
OpenStack Dashboard Overview
If the login was successful, you should see the overview page of the OpenStack dashboard:
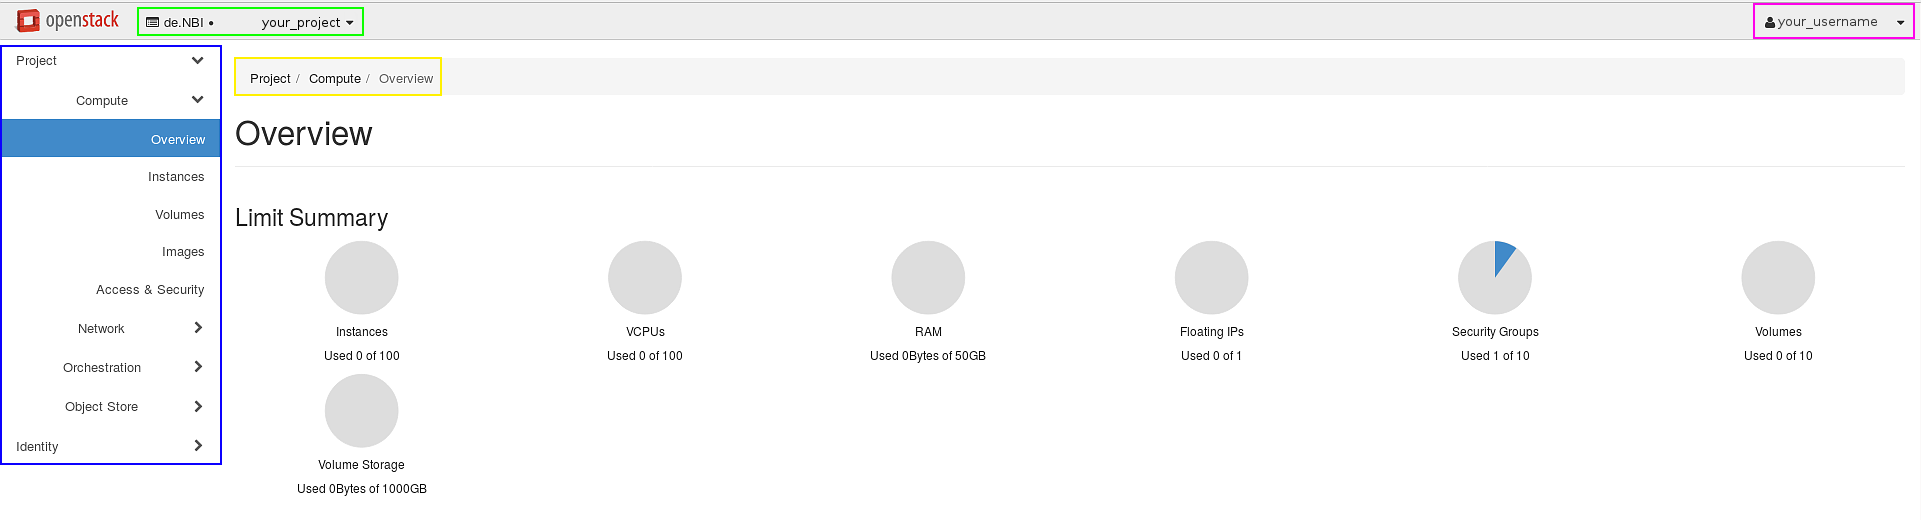
At the top left you should see your current project in the de.NBI Domain (green box). If you have more than one project, you can switch into another one here (click on the arrow down button).
At the top right you see your username (pink box). When you click on that arrow, you get a dropdown menu. Here, you can get to your user specific settings (changing dashboard settings and appearance and your password), get to the official user documentation by OpenStack, change your theme or log out.
On the left is the control menu (blue box) to navigate you through your project. The current page is highlighted in blue (In our case Project → Compute → Overview). This information can also be found in the yellow box. This could help you navigate to the right page, in the case you have trouble to find the current page we are operating on.
The overview page summarizes the resource allocation within the current project (center of the page):
- Launched instances
- Used VCPUs
- Used RAM
- Allocated floating IPs
- Used security groups
- Number of Volumes and Volume Storage
SSH Setup
Next, we have to setup SSH to login to our instances after they are launched. Go to  and click on Key Pairs (green box). You should see this page:
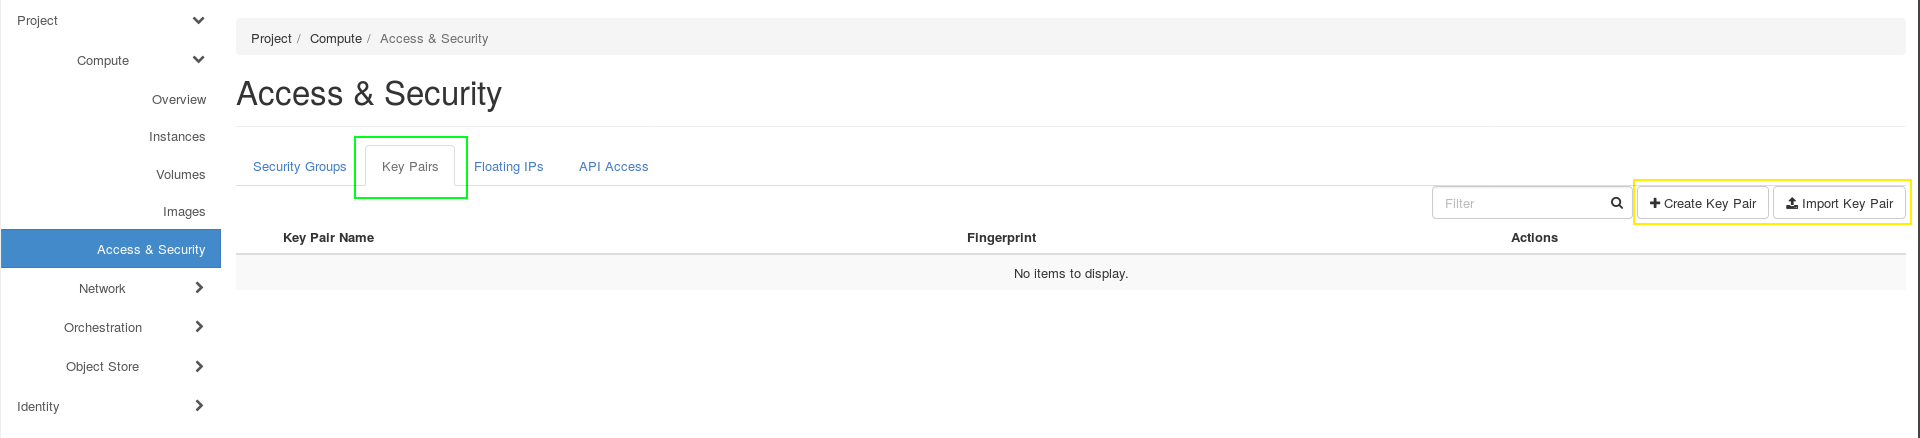
If you do not have an SSH key or you are not sure whether you have one, please visit this nice instruction from Atlassian.
Now, you can click on Import Key Pair (right button in the yellow box) and import your SSH key. Afterwards, your key should be listed on . In chapter Getting Access to the Instance we will use this key.
Creating a Router and a Network
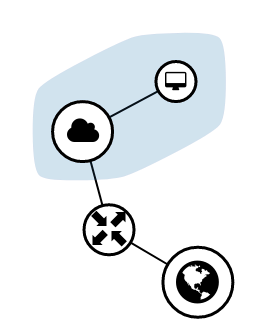
We want to create a network to get access to our in the near future launched instances. First, we get to the Network Topology page:  . When you click on Graph (red box), you should see this page:
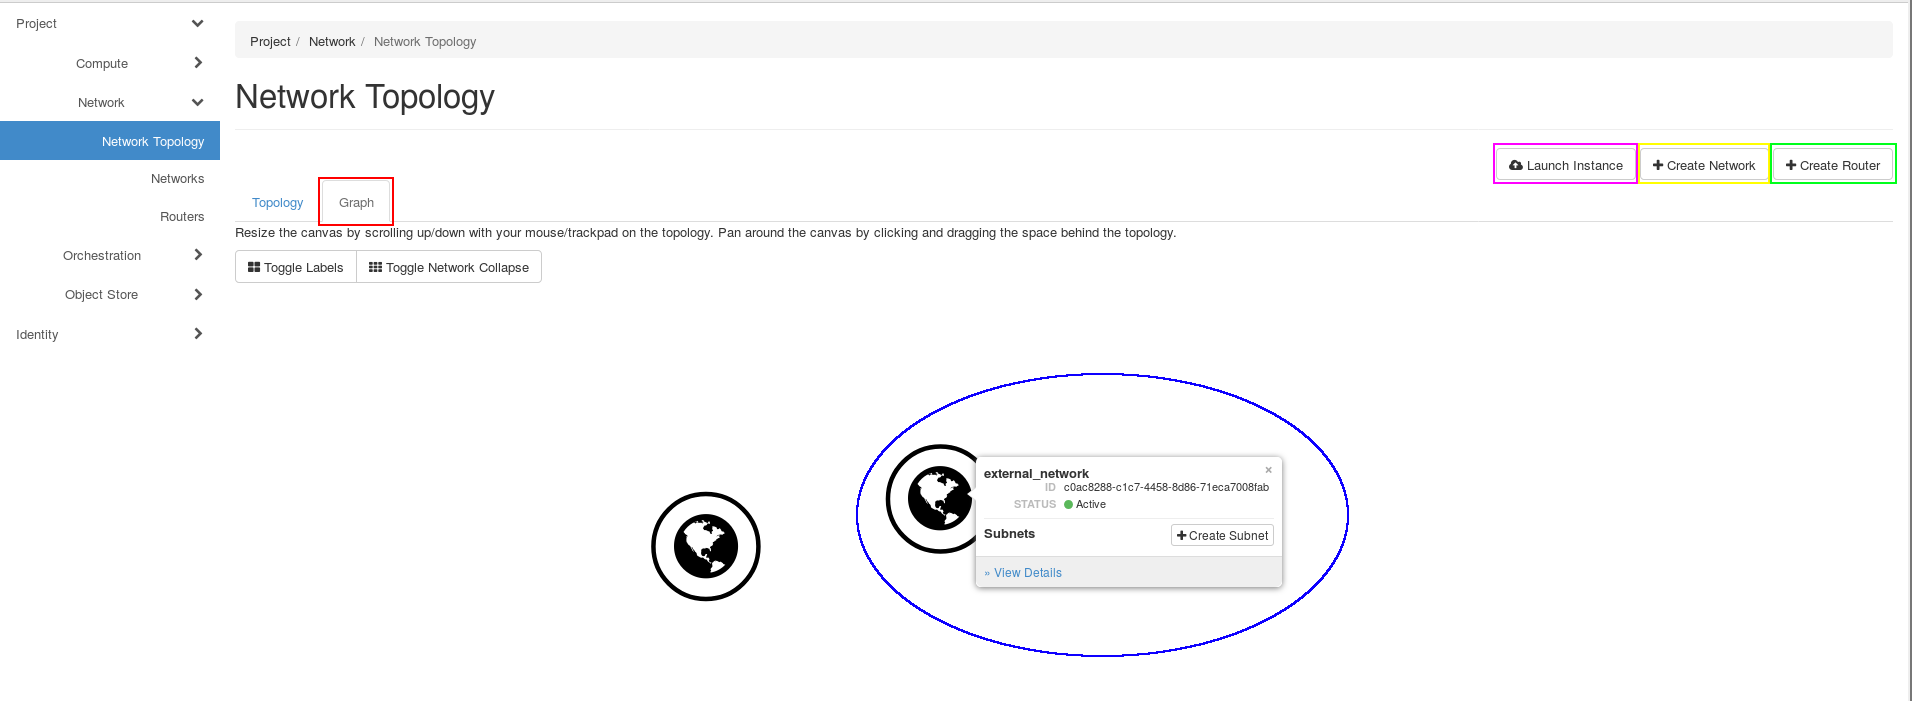
Here you can see the external network (blue elipse).
What do we need to access our instances:
- Router
- Network
- Subnet
Router
Click on the Create Router button (green box). A form should appear:
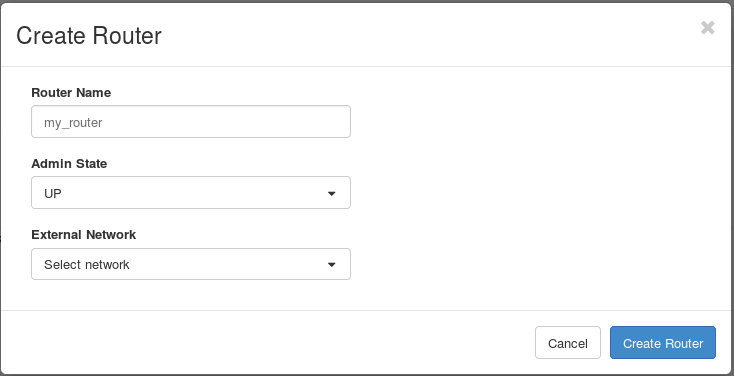
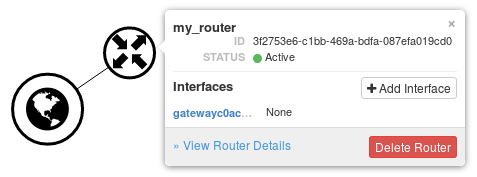
Fill in the Router Name and select the external_network for the External Network. Click on the blue button Create Router. Your network topology should looks like this:
Network and Subnet
Now, we need a network. Click on Create Network (yellow box). A three-part form should appear (Network, Subnet, Subnet Details):
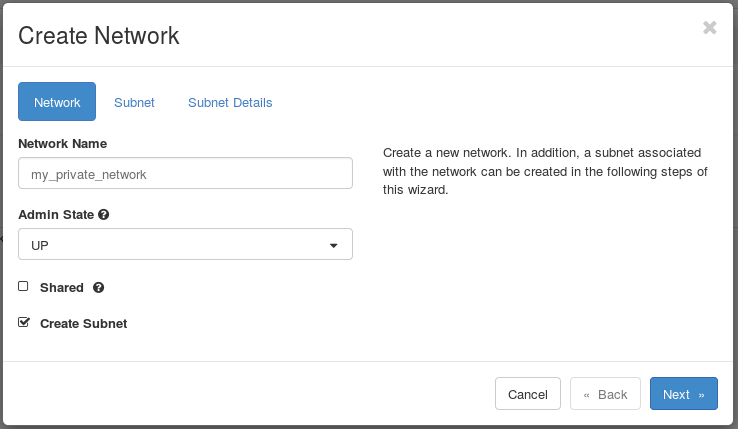
In the first part fill in the Network Name and then click on the blue Next button.

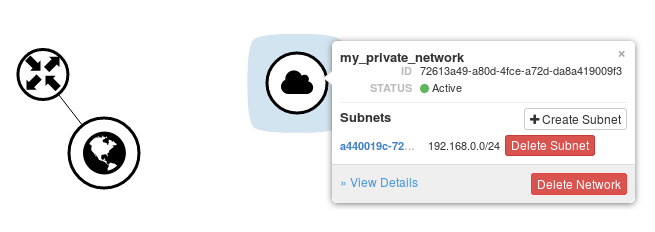
Here, you have to specify your Subnet Name and your Network Adress (e.g. 192.168.0.0/24). After this, click on the blue Next button again. On the third page you can specify additional attributes for the subnet. For more information hover over the questionmarks. In this guide we skip this step and click on the blue Create button.
Now your topology should include your network:
We want to connect our Router with our new Network. Click on your Router  . A tooltip should pop up. Click on Add Interface. A form will appear:

Select your Subnet and click on the blue Submit button. Your topology graph should look like this:
For further reading visit our Networking page
Launching an Instance
Finally, we can launch our instances. We are still on . Click on the Launch Instance button (pink box on the picture in the last chapter). A new Launch Instance form will appear:
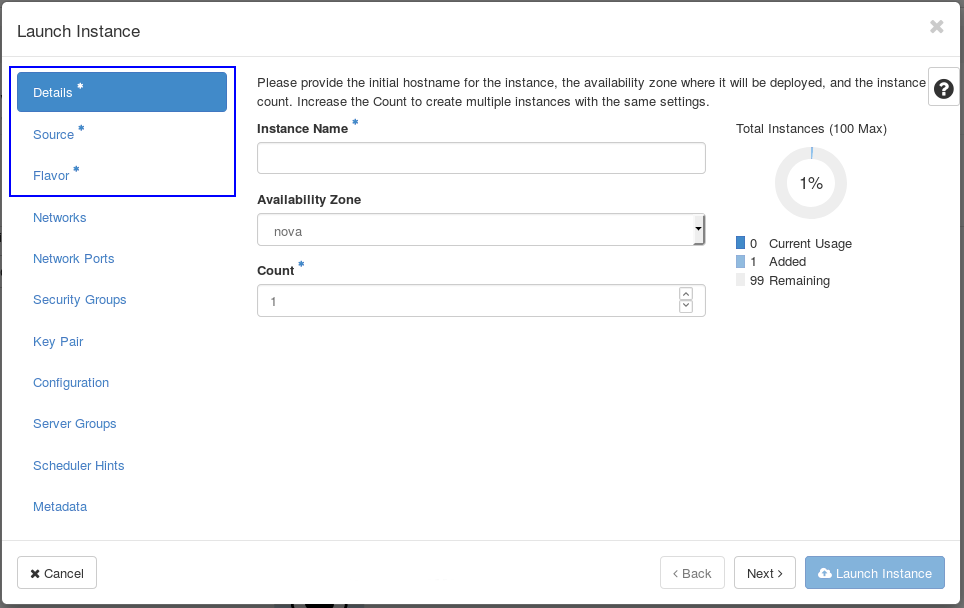
OpenStack fills some information with defaults. Thus, we have to fill the fields on the pages marked with a blue star (blue box).
On the first page we have to specify an Instance Name. After this, click on the Next button or on Source* . The blue star next to Details should disappear:
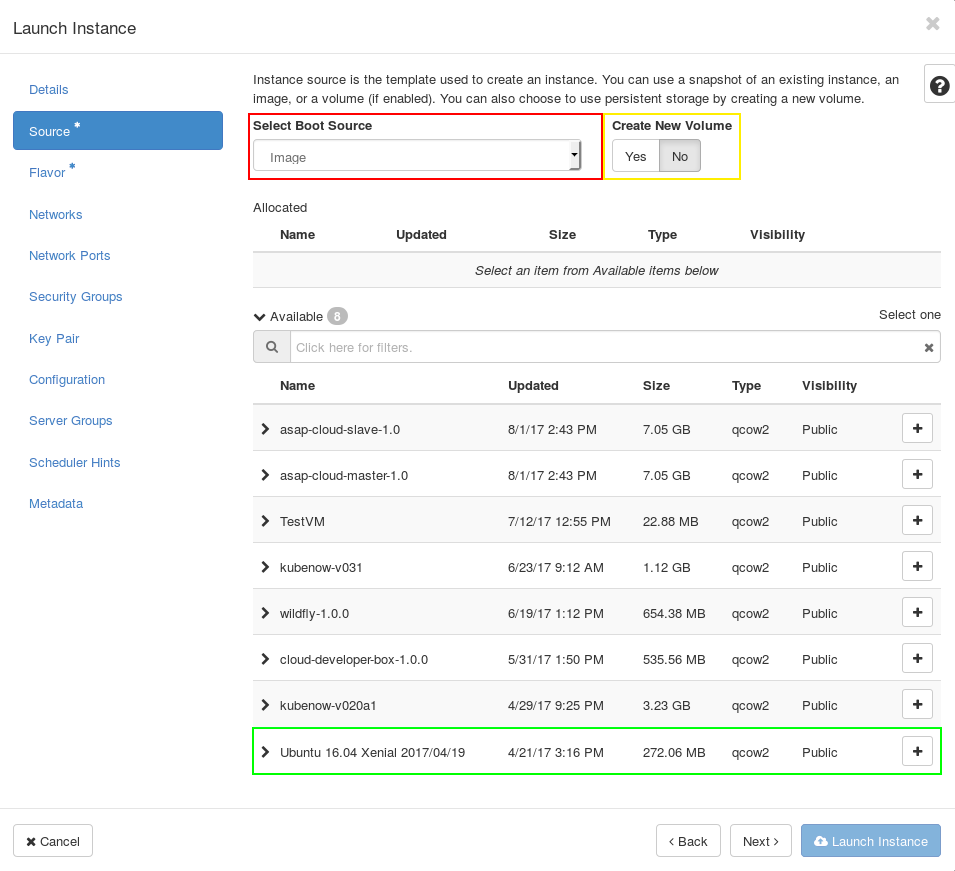
- Select Image as Boot Source (red box).
- Select No for Create New Volume (yellow box)
- Select an image as source to create the instance (e.g. Ubuntu 16.04 Xenial 2017/05/19 (green box))
After this, click on the Next Button or Flavor* .
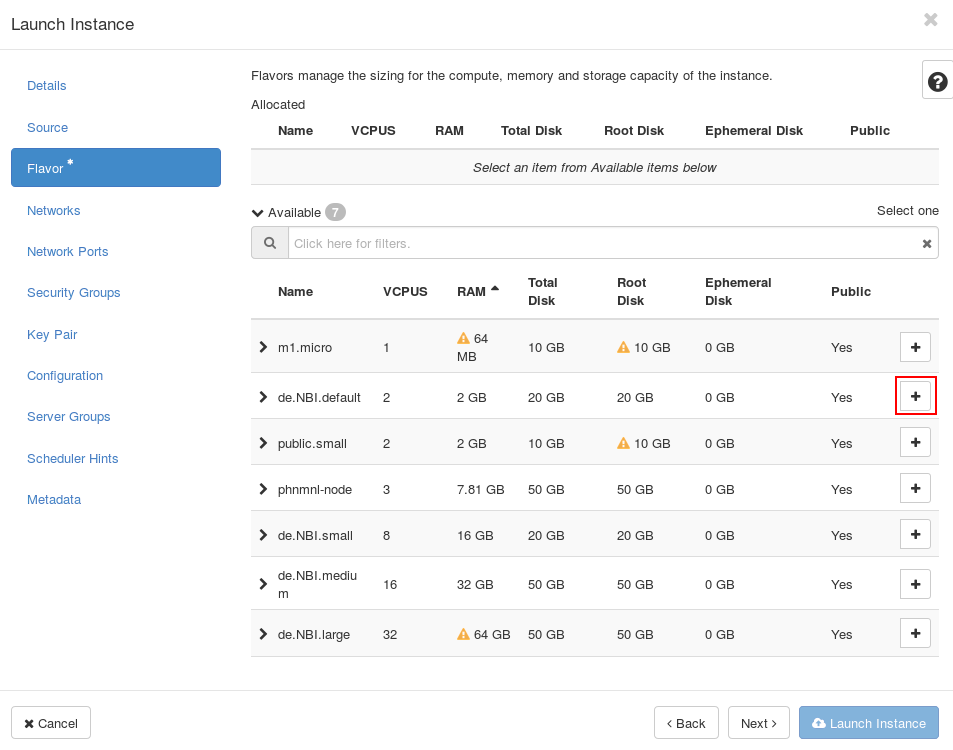
A flavor defines a virtual machine setup by defining parameters like hard disk size, available memory or CPU core number. Click on the + Button next to de.NBI.default flavor (red box). Now the star next to Flavor should disappear. You can click on the blue Launch Instance button to launch your instance. Your Network Topology Graph should look like this:
Great!!!
Getting Access to the Instance
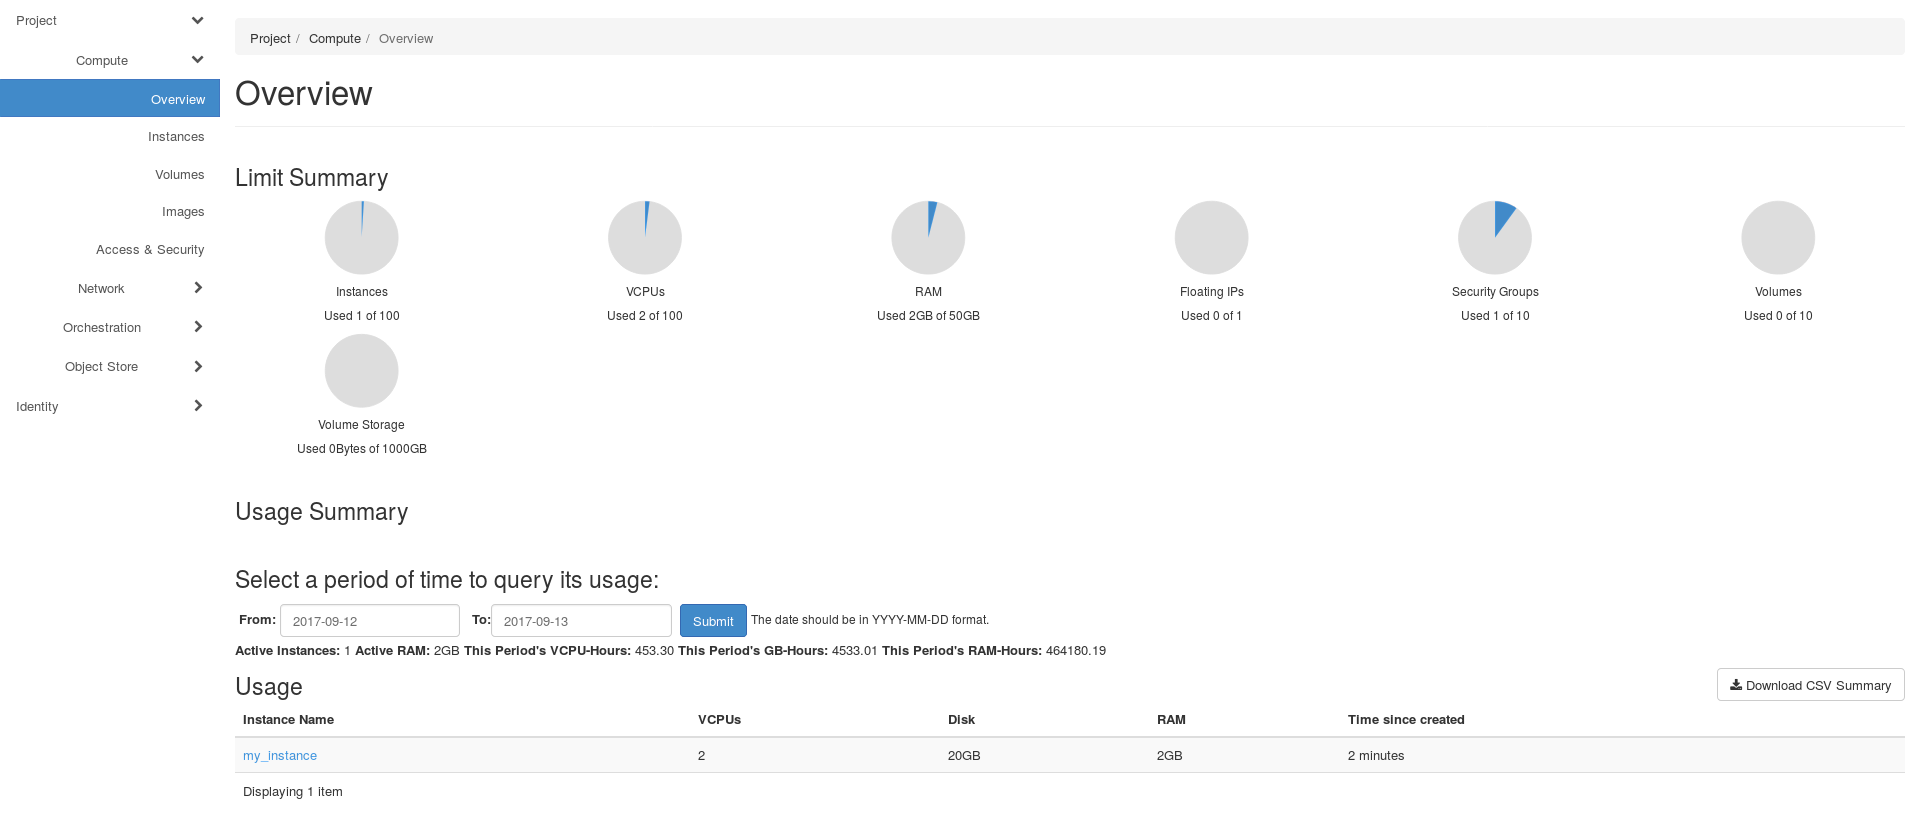
On the Project → Compute → Overview page, we can see that we have allocated some resources:
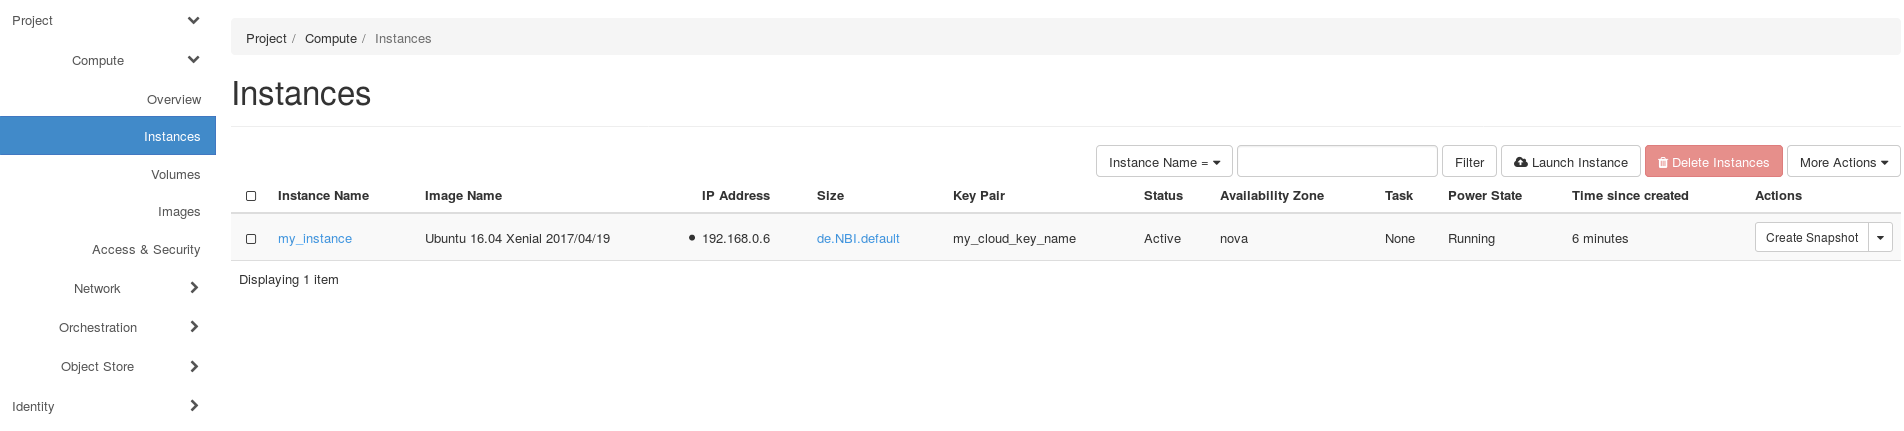
On Project → Compute → Instances we can see our instance and that it is running:
Floating IP
In order to connect to your virtual machine (= instance), it must be related to a public network address. A private, fixed IP address, used “for communication between instances”, will be assigned automatically to the instance. An IP adress “for communication with networks outside the cloud, including the internet” have to associated manually. Within the “Instances” tab, determine the machine for which a floating IP should allocated. To get access to our instance, we need to associate a Floating IP to it. Click on the arrow next to Create Snapshot. A dropdown menu appears:  Click on Associate Floating IP:
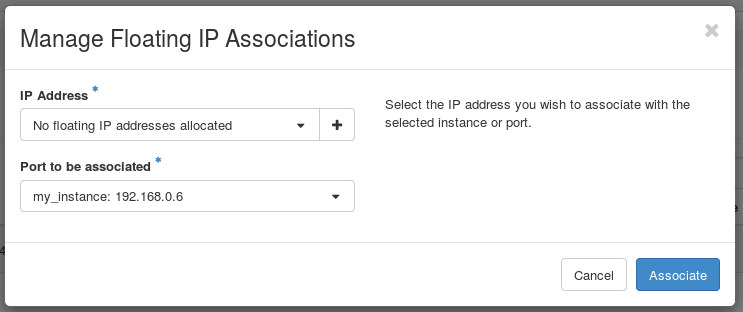 Click on the + next to No floating IP addesses allocated in the IP Address field:
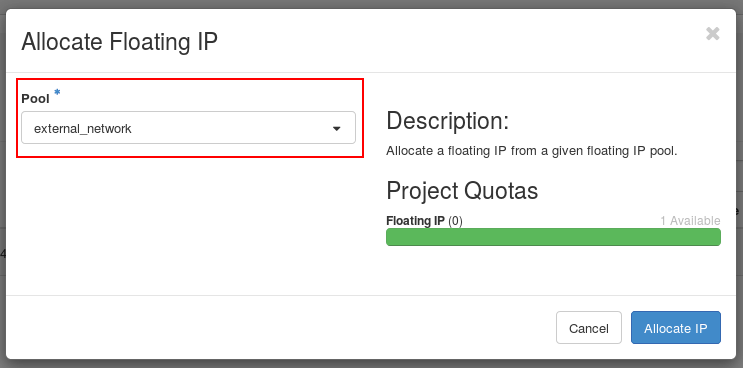
Select the external_network in the pool field (red box) and click on the blue Associate IP Button:
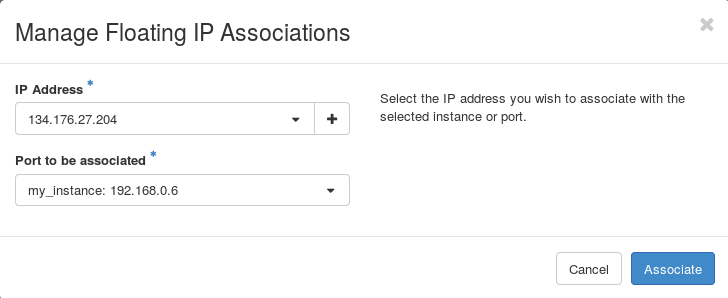
Click on Associate to associate your new floating ip to your instance. Now, your instance should have two ip adresses:

Security Groups
First of all, you should read our Security aspects in clouds page!
You are responsible for a secure setup of your VMs. To allow external access to your instance via SSH, you have to change the security group and allow SSH! Go to Project → Compute → Access & Security
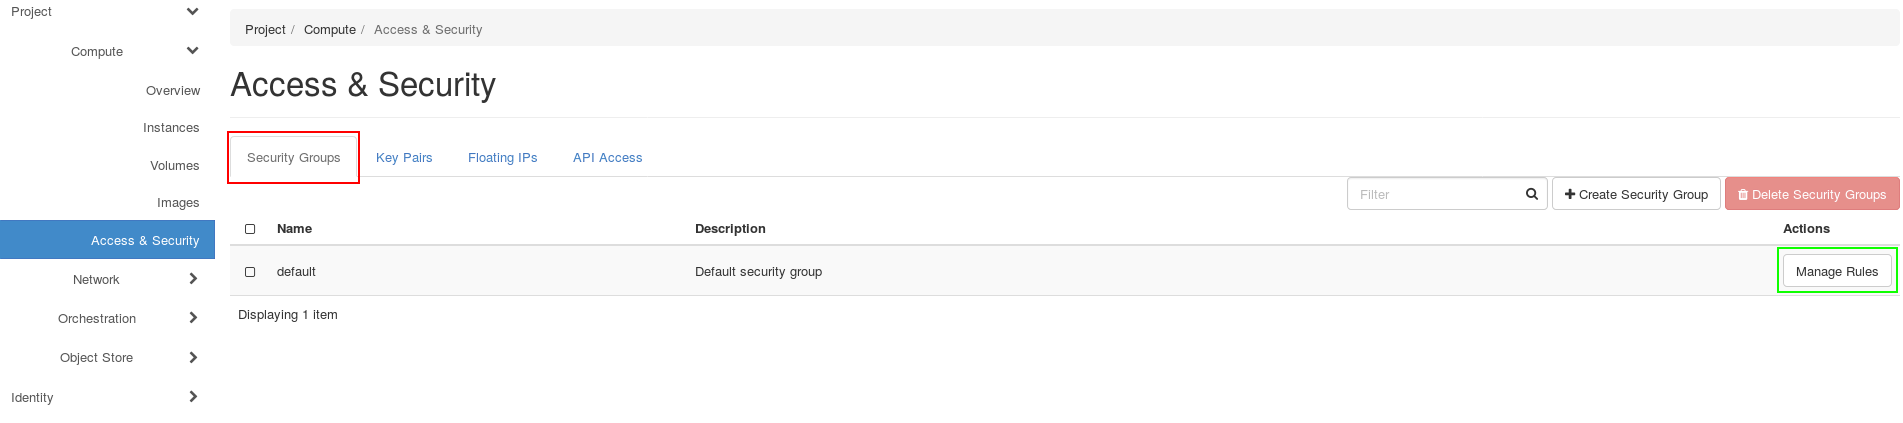
Click on the Security Groups Tab (red box). You should see one security group with the name default. Click on Manage Rules next to the default security group (green box).
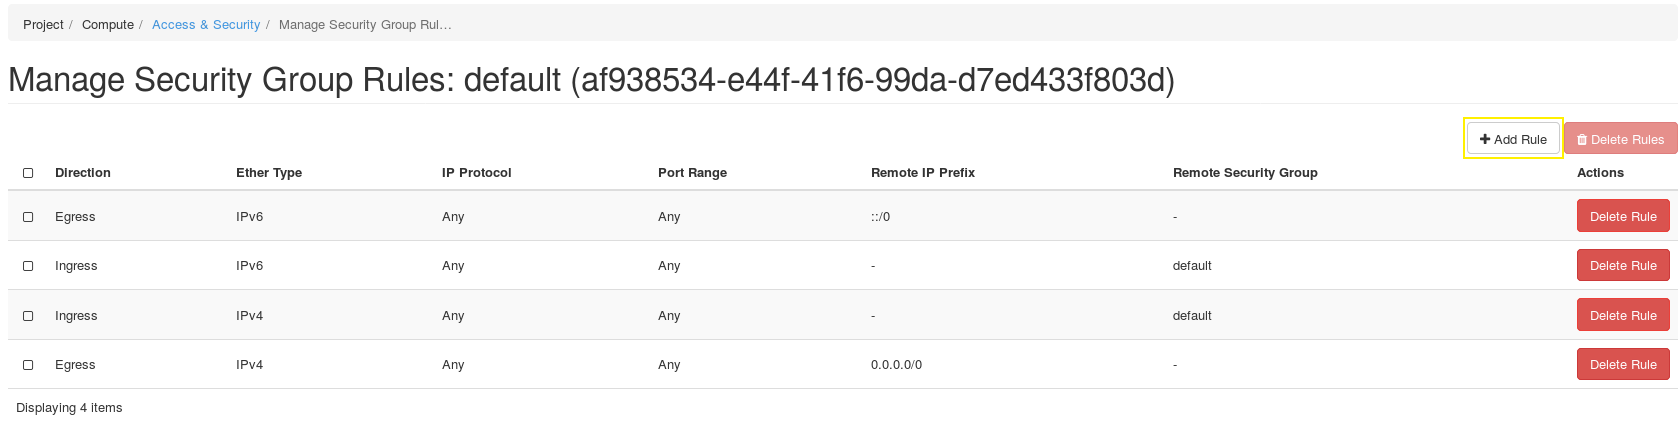
Click on Add Rule (yellow box)
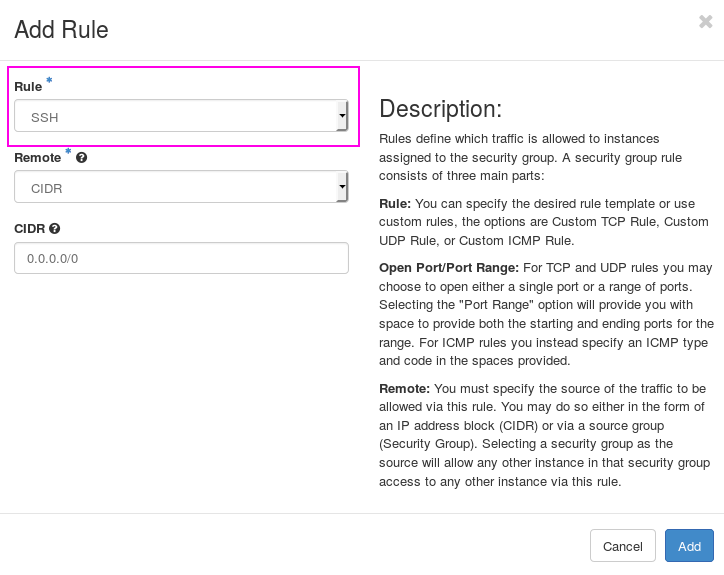
In the Rule field, select SSH (maybe you have to scroll a little bit down)(pink box). Click on the blue Add button.
Login
Now you can login (in our case as the ubuntu user):
ssh -i ~/.ssh/my_cloud_key_name.pem ubuntu@<yourFloatingIp>
Great! You have started your first instance in the de.NBI cloud